Solidworks Tutorial: Sheet Metal #001
The sheet metal tool allows you to quickly create sheet metal part designs using a simple design process, all helping to save time and development costs.
Let’s see how this works
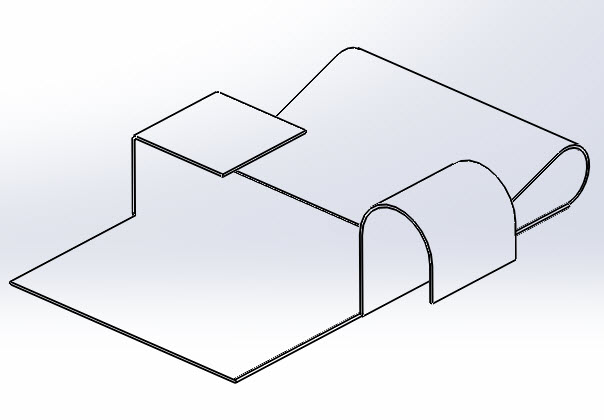
Solidworks sheet metal tutorial
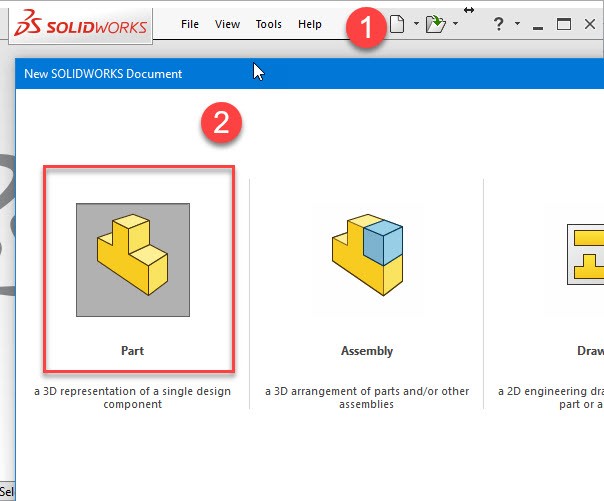
Step 1
First Create a New Part.
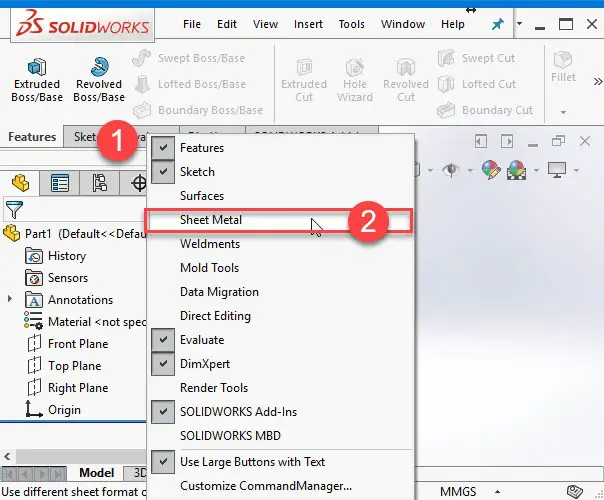
Step 2
Right-click on the toolbar and activate Sheet Metal.
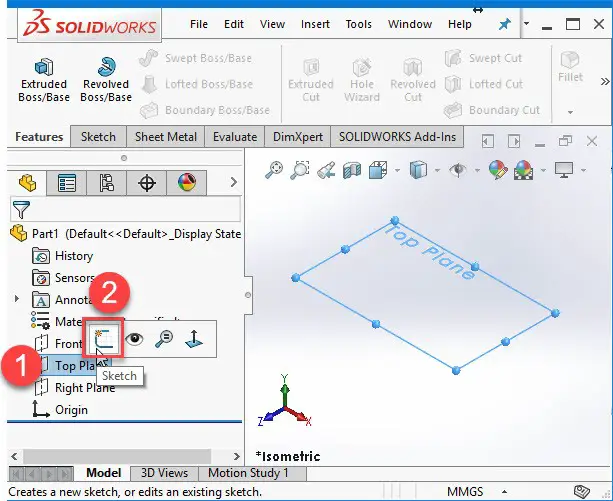
Step 3
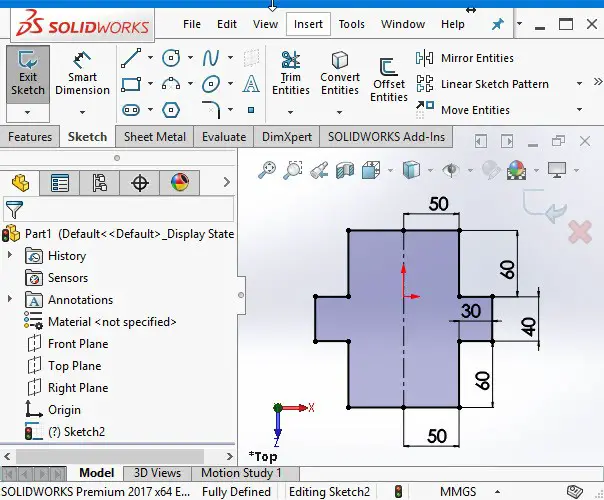
Click on the top plane and then create a new sketch.
Step 4
Now, sketch and use Smart Dimension to give a dimension to the design.
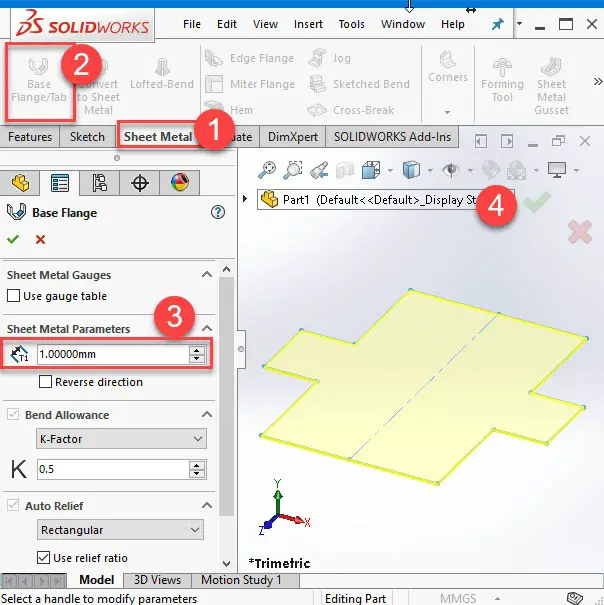
Step 5
Click on the Sheet Metal tab, select Base Flange/Tab and give 1 mm to the sheet metal parameters.
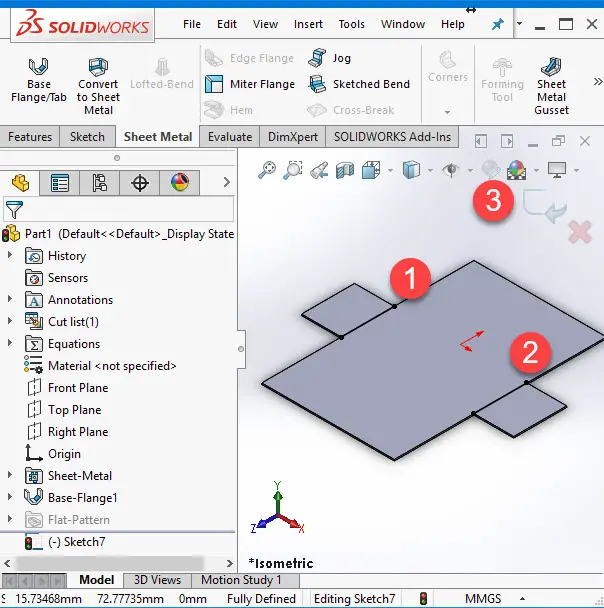
Step 6
To bend the sheet metal part, sketch lines on the part as shown in the picture.
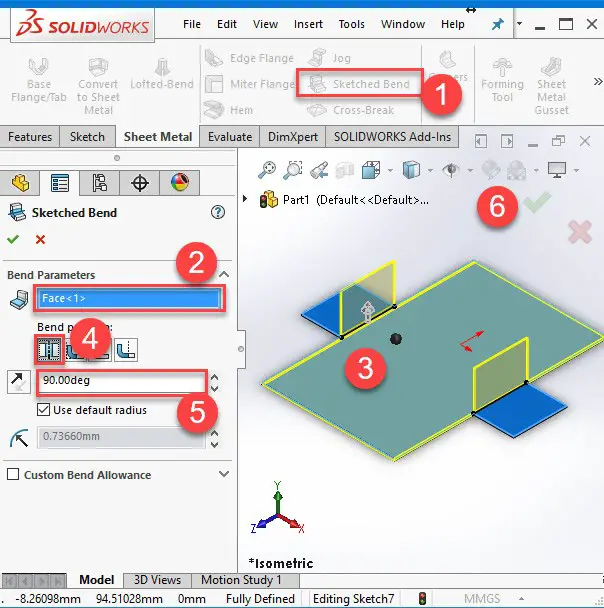
Step 7
Bend the part by clicking Sketched Bend, or Insert >> Sheet Metal >> Sketched Bend. The part bends following the sketched lines.
Step 8
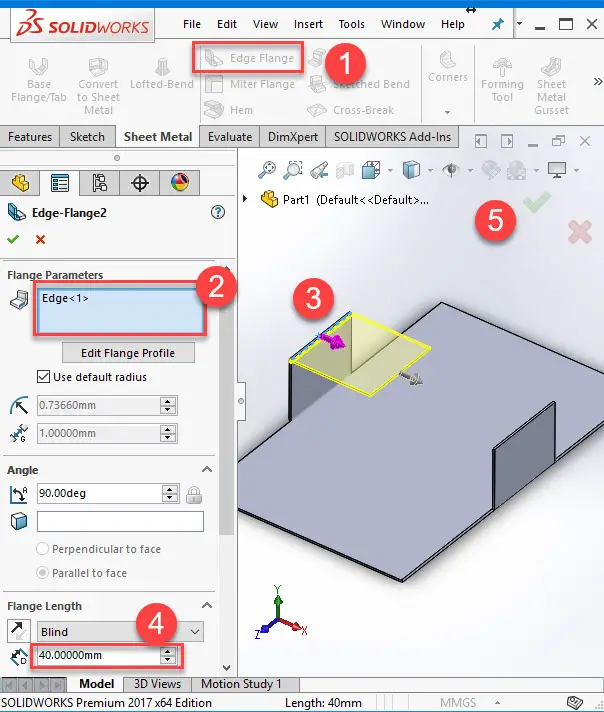
In this step, we are going to extend the edge with Edge Flange. Click on the right edge as it is shown below and extrude it by 30 mm.
Step 9
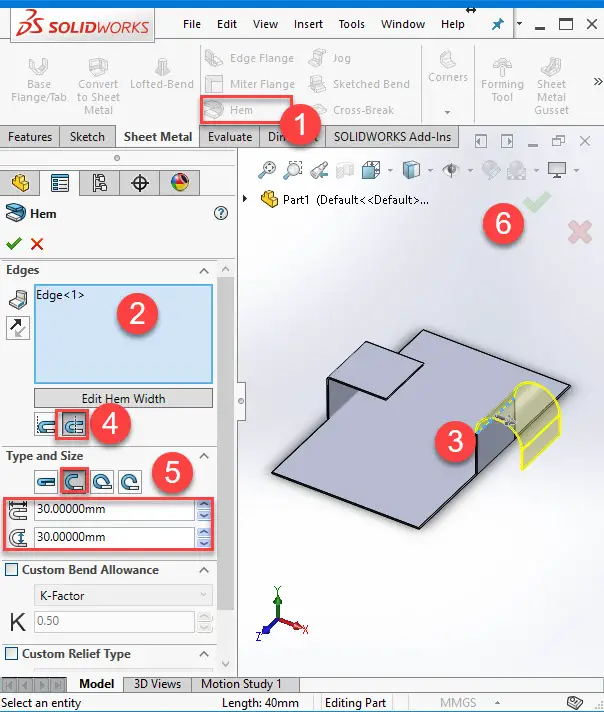
The Hem tool adds a hem to your sheet metal part at a selected edge. In an open sheet metal part and in the graphics area, select an edge as shown.
Step 10
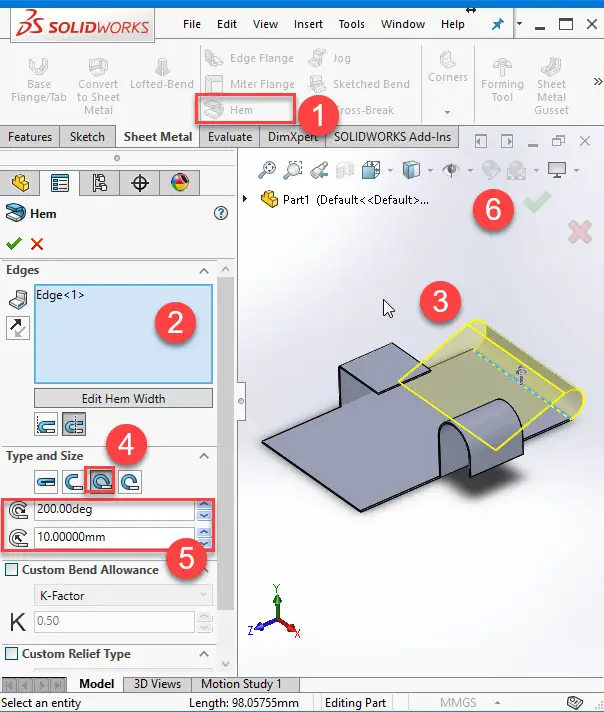
Repeat the last step again but this time try a different type of hem.
There are specific sheet metal features you can use to create sheet metal bodies quickly. However, in some circumstances when the design requires certain types of geometry, you can use non-sheet metal feature tools, then insert bends or convert the part to sheet metal.


Nhận xét
Đăng nhận xét